Adorable Newborn Photography Ideas for Boys That Capture Tiny Details
On this page
There is nothing quite as magical as the first few weeks of a baby boy’s life. His fingers curl into tiny fists, and his sleepy expressions seem to shift by the minute. A photograph can capture those fleeting details, a gift parents will hold onto forever. But without the right guidance, the process can feel overwhelming. This guide walks you through every step of planning and executing a newborn photography session for a boy—from timing and safety to prop styling and pose selection. You’ll find practical tips for keeping the baby calm, choosing a masculine yet timeless aesthetic, and capturing the tiny details parents will treasure. Whether you’re a parent behind the camera or a professional refining your craft, these ideas will help you create heartfelt, adorable images that celebrate the newest little man in the family.
Preparing for the Session
Scheduling Within the First Two Weeks
Timing is everything. The ideal window for those dreamy, curled-up portraits falls between day five and day fourteen after birth, when your little boy is sleepiest and most flexible. In these early days, babies naturally curl into the fetal position, which makes safe, beautiful posing far easier. Book your session for mid-morning or early afternoon, when you and your baby are most relaxed. Plan for one to three hours—this isn’t a rushed affair. Frequent breaks for feeding, burping, and soothing aren’t just expected; they’re essential. A calm, unhurried baby is a cooperative one, and those tiny sighs and peaceful expressions are exactly what you’ll want to immortalize.
What Parents Should Bring
Preparation prevents stress. Ask parents to pack extra diapers—newborns have impeccable timing when it comes to mid-pose messes. Have formula or expressed breast milk ready in a bottle, since a hungry baby won’t settle for long. A pacifier can be a lifesaver when your son needs a bit of extra comfort to drift back to sleep. Beyond the basics, suggest a spare swaddle in a soft, neutral tone; it serves as a backup if the first gets soiled and offers a familiar scent to keep him calm. A white noise app on a smartphone mimics the womb and muffles startling sounds. Lastly, tuck a bottle of warm water into the bag—not for drinking, but for gently cleaning up unexpected accidents without the shock of a cold wipe. With these items on hand, the photographer can focus entirely on the fine details: the flutter of his eyelashes, the curve of his tiny toes, and the soft down on his shoulders.
Choosing a Masculine Color Palette and Props
Earthy and Neutral Tones
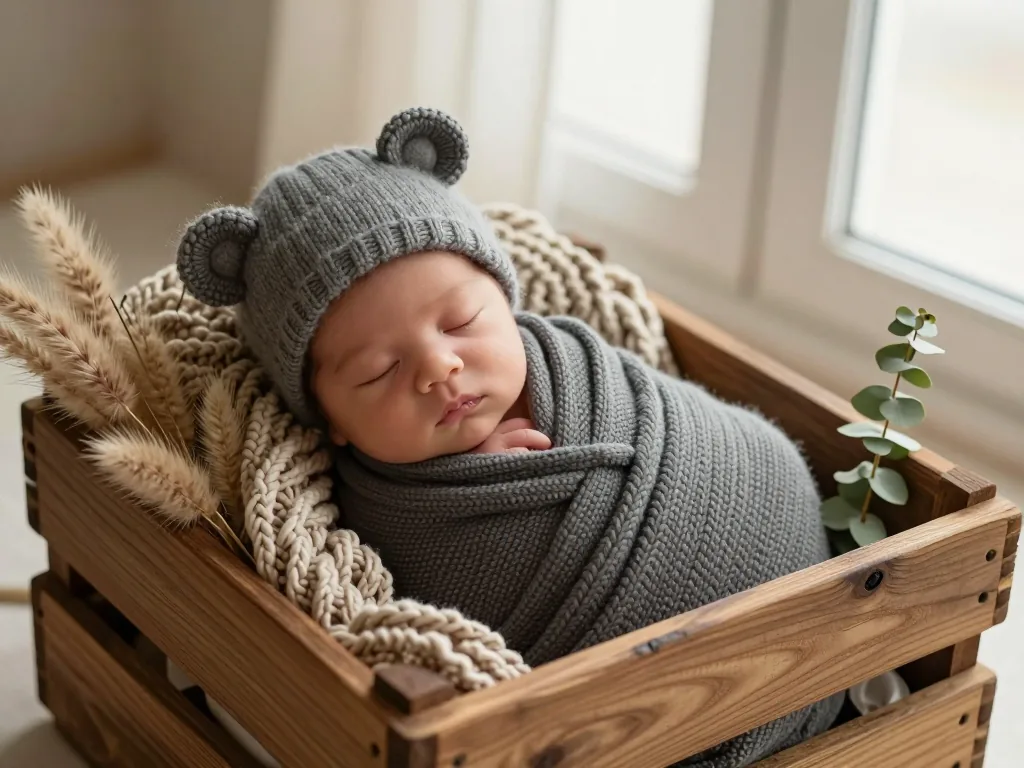
For a newborn boy’s session, earthy, neutral tones are the timeless choice. Gray, navy, olive, cream, and soft brown never feel dated. These colors pair beautifully with natural textures like wood, wool, and linen, keeping the focus on the baby’s delicate features instead of busy patterns. A cream knit blanket over a weathered crate, or a soft gray swaddle around a sleeping newborn, creates a quiet, sophisticated palette. Tiny eyelashes, button noses, and curled fingers take center stage. Skip stark whites and neon accents—they can wash out skin tones and steal attention.
Prop Ideas That Read as “Boy”
Start with foundational props that feel masculine without going overboard: wooden crates, woven baskets, faux fur rugs, and small knitted hats. They add warmth and texture while offering a safe, sturdy posing surface. For playfulness, try mini denim jeans, leather or felt animal ears—bear and fox are favorites—tiny sneakers, or a wooden sign with the baby’s name. Keep props proportional; oversized items overwhelm, while scaled-down pieces highlight the baby’s tininess. These combinations consistently deliver:
- Wooden crate with a cream blanket and a navy knit beanie
- Faux fur rug in gray or tan with the baby in suspenders
- Burlap sack with a tiny bow tie and a wooden name block
- Mini denim jeans draped over a basket edge with a bare chest pose
Each setup uses texture and color for a cohesive, masculine look, with the baby as the clear hero. The neutral palette lets props complement, not compete, and earthy materials add depth that makes the photos feel warm and intimate—capturing the tiny details you’ll treasure for years.
Safe and Popular Poses for Baby Boys
Classic Poses That Work Well
Newborn photography for boys often comes down to a few timeless poses that never miss. The froggy pose—baby lying tummy-down, chin resting on folded hands—remains a favorite. It frames the face naturally and pairs beautifully with a tiny knitted hat or a bare back, drawing out those delicate shoulder blades and the soft curve of the spine. For something more relaxed, the side-lying pose feels safe and organic: baby on his side, one hand tucked near the cheek, knees slightly bent. It captures that curled-up, peaceful posture without forcing any awkward angles. Then there’s the wrapped pose—baby snug in a soft, breathable blanket. Add a miniature bow tie or suspenders over the wrap for dapper charm, giving a dressed-up look while keeping him cozy and secure. These poses shine because they let the photographer focus on tiny details: the flutter of eyelashes, the creases of little fingers, the soft fuzz on the ears.
Safety Rules for Every Pose
No pose is worth a risk. Never leave a newborn unattended on an elevated surface, a beanbag, or inside any prop—not even for a second. Every setup needs hands-on support from a professional or a dedicated spotter, positioned to catch or steady the baby at all times. Head and neck support must be continuous, especially during transitions. Never force a position; if the baby resists, adapt. And watch the room temperature—newborns lose heat quickly when undressed, so keep the space warm and a blanket ready between shots.
If the baby becomes fussy or shows signs of distress, pause the session immediately. A calm baby is a safe baby, and no photo is worth compromising comfort or safety.
Feed, burp, and soothe as needed. Watch for cues like skin color changes, hiccups, or sudden crying. A successful session is one where the baby stays relaxed—and the images reflect that peace.
Lighting and Camera Settings for Soft, Flattering Images
Using Natural Window Light
Window light is the most forgiving, beautiful source for newborn portraits—far better than flash. Place the baby on a soft blanket or prop perpendicular to a large window, letting sheer curtains filter the light. This turns harsh sunbeams into a broad, creamy glow. Never use direct flash on a newborn’s eyes; their retinas are still developing, and even one burst can cause discomfort or lasting strain. Let the window do the work instead. With the window at a 45-degree angle to the baby’s face, side lighting casts gentle shadows along cheekbones and the curve of a tiny nose—dimensionality without harsh contrast. This directional light also reveals the fine, downy texture of newborn hair and the delicate creases in hands and feet, exactly the details you want to showcase. In a room with multiple windows, choose one offering indirect morning or late-afternoon light; midday sun can overpower even sheer curtains. Adjust intensity by moving the setup closer or farther from the window, and place a white reflector—a simple foam board works wonders—on the shadow side to lift darkness from the face.
Studio Lighting Alternatives
No natural light? A diffused studio strobe or softbox set to low power is your next best friend. Bounce the light off a wall or ceiling, or angle it 45 degrees away from the baby’s face—never point it directly at them. Add a large diffuser panel between the light and the baby to soften the beam further. This mimics window light’s gentle falloff, wrapping the baby in a flattering, even glow. Keep power low, around one-eighth to one-quarter output, and check your histogram to avoid blown-out highlights on skin. Crucially, maintain a room temperature of 75 to 80 degrees Fahrenheit. Warmth keeps the baby sleepy and relaxed, making posing easier and preventing the startle reflex from ruining a shot. It also aids flexibility, letting you gently curl the baby into classic tucked poses without resistance. When the baby is content, you can take your time adjusting the light, shooting from multiple angles, and capturing fine details—the curve of an ear, the grip of a tiny fist—without rushing.
Managing the Session Flow and Post-Processing
Keeping the Baby Calm and Content
The secret to capturing those delicate details—the curl of a tiny fist, the whisper of newborn lashes—lies not in the camera settings but in the baby’s demeanor. A fussy, overstimulated newborn will clench, wrinkle, and cry, turning every pose into a battle. Feed, burp, and thoroughly soothe the baby before you even attempt a new setup. Keep a pacifier within arm’s reach at all times; a quick suckle can instantly settle a wriggling infant between shots. Structure your session in short bursts of ten to fifteen minutes of active posing, then pause for a warm cuddle or a diaper change. This rhythm prevents the baby from becoming overwhelmed and lets you reposition swaddles and props without rushing. Watch for early cues—rooting, hiccups, or a sudden tensing of the limbs—and respond immediately. A calm baby will naturally fall into those curled, womb-like poses that make for the most heart-stopping images. Remember, the session belongs to the baby; your timeline must bend to their needs, not the other way around.
Editing for a Timeless Finish
When you move to post-processing, resist the urge to modernize with heavy contrast or oversaturation. The goal is a warm, creamy skin tone against soft, muted backgrounds—an aesthetic that looks as beautiful in a leather-bound album as it does on a phone screen. Begin by adjusting the white balance to remove any yellow or blue casts, ensuring the baby’s skin looks natural and luminous. Lightly dodge and burn to subtly bring out the baby’s eyelashes, the dimples in their knuckles, and the delicate curve of their tiny fingers. Remove temporary blemishes or stray lint from blankets, but never alter the baby’s natural features. Parents want authentic memories, not a plastic, airbrushed version of their child. When cropping, focus on composition—leading the eye to the baby’s face or the tiny details of their feet—but always keep the original resolution intact for high-quality printing. Finally, save both a color and a black-and-white version of each final image. The monochrome treatment adds a classic, editorial feel that beautifully highlights texture and shadow, giving parents a versatile gallery without any extra cost.
Conclusion
With careful planning, a calm environment, and a focus on safety, you can create stunning newborn portraits for boys that highlight their tiny features and masculine charm. The key is to embrace simplicity—soft neutrals, textured wraps, and natural poses—so those delicate fingers, wrinkled toes, and peaceful expressions take center stage. Remember to work at your baby’s pace, keeping sessions short and warm, and always prioritize comfort over perfection. Now, gather your props, choose a well-lit spot, and start capturing those fleeting, heart-melting details you’ll treasure forever.