Sweetest Newborn Photography Ideas for Baby Girls
On this page
There is no sweeter moment to preserve than the fragile, curled-up perfection of a newborn daughter. Capturing her in the first two weeks offers a fleeting window of pure, sleepy serenity. This guide walks you through every essential step—from gentle preparation and safe posing to the softest palettes, props, and practical troubleshooting—so you can create peaceful, heirloom-quality portraits without stress. Whether you’re a parent with a camera or a professional photographer, you’ll find the inspiration and know-how to turn tender moments into timeless art. Let’s turn those tiny toes and delicate lashes into images you’ll treasure forever.
Planning the Session Window and Environment
Why the First 5 to 14 Days Matter Most
The golden window for newborn photography is remarkably brief, yet it makes all the difference in the world. During the first five to fourteen days after birth, your baby girl is at her sleepiest and most naturally flexible. She still curls into the familiar, womb-like positions that make those dreamy, posed shots possible—tiny fists tucked under her chin, legs folded beneath her, and a peaceful, deep slumber that allows the photographer to gently arrange her without fuss. After this narrow period, babies become noticeably more alert, startle more easily, and are far less tolerant of being handled, swaddled, and repositioned for extended stretches. Their limbs begin to straighten out, and those classic froggy poses become nearly impossible to achieve safely. This is why you should book your photographer the moment you have a due date, and if you are planning a DIY session at home, mark the calendar for day six or seven—the sweet spot where she is still deeply sleepy but past the initial chaos of the first few days.
Setting Up a Warm, Calm Space
A content newborn is a sleepy newborn, and temperature is your greatest ally. Keep the room between 75°F and 85°F (24°C to 29°C) so your undressed baby girl stays cozy and content throughout the session. A space heater pointed safely away from her can help maintain that warmth, while closed curtains soften any harsh natural light into a flattering, diffused glow. White noise played at a low volume mimics the constant whoosh of the womb and works wonders for keeping her settled. For a smooth, stress-free shoot, consider these practical touches:
- Choose a spot with a large window for soft, indirect light—never direct sunbeams on her delicate skin.
- Have a changing station and a feeding corner within arm’s reach so you can soothe and refuel her without breaking the flow.
- Keep all props, wraps, headbands, and backup outfits pre-washed, steamed, and ready to grab at a moment’s notice.
- Place a plush rug or thick mat under the posing area to cushion her tiny body and give you both a comfortable surface to work on.
A warm, quiet, and well-prepared environment transforms a potentially stressful session into a gentle, unhurried experience—one that allows your baby girl to stay blissfully asleep while you capture the softest, sweetest images of her earliest days.
Essential Props and Styling for Baby Girls
Soft Textures and Feminine Accents
Layering soft, tactile elements is the key to a beautiful newborn session. These textures complement your baby girl’s delicate features. Start by gathering pastel wraps, floral headbands, knitted bonnets, and airy lace or tulle. Small baskets or wooden crates lined with plush blankets make versatile bases for poses. They let you nestle your little one securely while adding depth to the frame. Keep each prop easily swappable between shots. That keeps the session fluid and the baby calm.
Classic palettes—blush pink, cream, ivory, soft peach, muted lavender—never fail to evoke a timeless, feminine feel. For a more contemporary look, neutral beige and warm gray work beautifully. They create a minimalist backdrop that lets your baby’s natural features shine. When choosing fabrics, prioritize comfort above all. Skip scratchy materials or anything with small, detachable parts. Plan ahead with at least three wrap colors and two headbands ready. That gives you enough variety to transition through several setups without repeating a look.
Building a Prop Library on a Budget
Stunning results don’t require an expensive studio setup. A clean wicker basket, a simple wooden crate, a draped length of soft cloth, and a few silk flowers can transform an ordinary space into a dreamy scene. For DIY sessions, borrow items from friends or shop secondhand at local thrift stores. These sources often yield beautiful, unique pieces at a fraction of the cost. Wash all fabrics in fragrance-free detergent beforehand to protect your baby’s sensitive skin. A full starter prop kit—wraps, bonnets, baskets, headbands—typically runs from €30 to €150 per kit. The price depends on how many pieces you choose and their material quality. This range lets you start modestly and expand gradually, focusing on what truly works for your baby’s comfort and your creative vision.
Safe and Comfortable Posing Techniques
Classic Poses That Flatter Baby Girls
Mastering a few timeless poses gives you a portfolio of images that feel soft, feminine, and utterly timeless. The ‘froggy’ pose is a favorite for good reason: with baby’s bottom lifted and chin resting gently on her own hands, it showcases those impossibly tiny toes, delicate fingers, and round cheeks. To achieve it safely, start by placing the baby on her tummy on a firm, padded surface. Gently bend her knees up toward her hips so her bottom rises naturally. Turn her head to one side, with her hands tucked under her chin for support. This pose works beautifully with a floral headband or a lace wrap draped loosely around her hips.
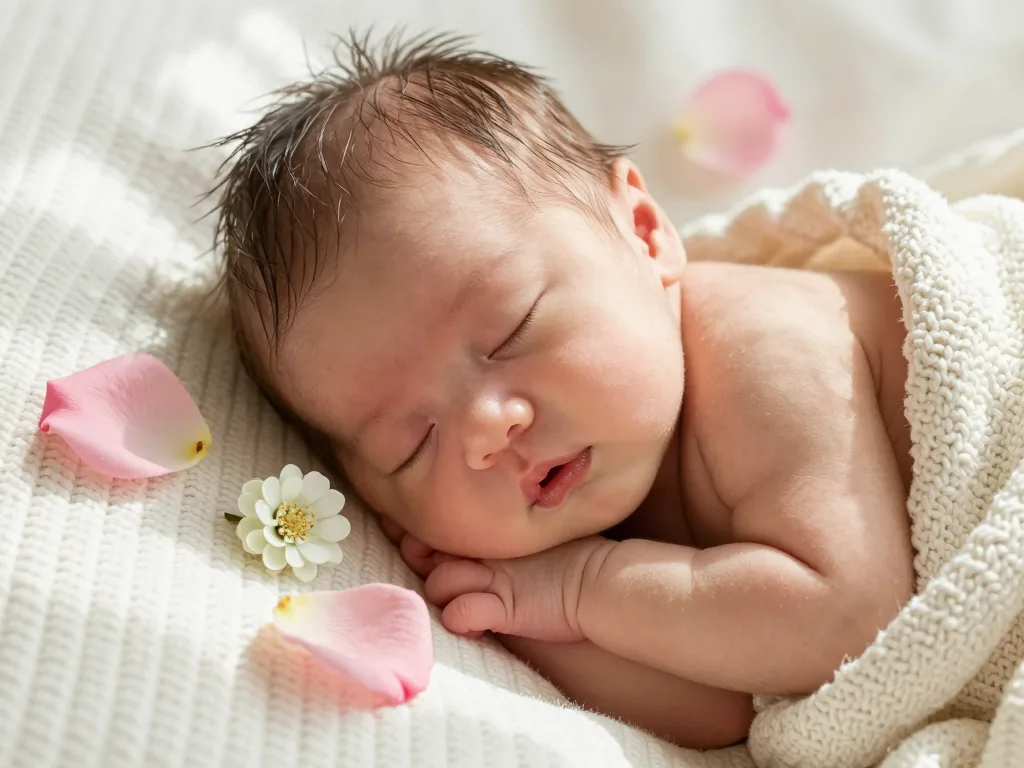
Side-lying is another go-to, capturing the curve of her cheek and the soft fold of her ear. Position her on her side with one hand resting near her face and the other extended slightly forward. Tuck a small rolled blanket behind her back for gentle support—though a parent’s hand should remain visible or ready at all times. Swaddled poses are the easiest and most calming. Wrap her snugly in a stretchy knit or muslin, leaving only her face and maybe one tiny hand free. Tucking her limbs close mimics the security of the womb and keeps her settled and warm, making it easy to add a soft bow or a string of faux pearls across the wrap.
Always build every pose from the ground up. Start with the baby already lying on the surface, then adjust her limbs one at a time, never lifting her more than a few inches at any moment. Use a firm, padded surface—a beanbag, a foam mat, or a sturdy posing pillow—and cover it with a soft, seamless backdrop.
Safety Rules for Every Single Shot
No image is worth a compromised position. Never leave the baby unattended on an elevated surface, even for a split second. Every pose must be supported by a parent or spotter’s hands, even if those hands are later edited out in post-production.
“If the baby is not fully supported by a human hand or a solid, flat surface, the pose is not safe—no exceptions.”
Keep the baby’s airway clear at all times. Avoid any position that pushes her chin toward her chest, as this compresses the airway. Check her skin color and breathing regularly—every minute or so, glance at her lips and cheeks to ensure they remain pink and relaxed. For the froggy pose, only attempt it when the baby is deeply asleep; a waking baby will fuss and shift, making the position unstable. Always keep one hand firmly on her back, ready to roll her to her side if she stirs. When in doubt, simplify: a wrapped pose with a parent’s hand resting on her belly is just as precious and far safer than a complex arrangement.
Managing the Session Flow and Baby’s Needs
A successful newborn session is less about perfect poses and more about working with your baby’s natural rhythm. Plan for a generous two to four hour window; feeding, burping, diaper changes, and cuddle breaks will occupy most of that time. The golden rule is to feed on demand—never let a hungry baby wait for the sake of a shot. Keep a bottle of expressed milk or formula warmed and ready, plus a pacifier for instant soothing when you need to reposition quickly. Establish a predictable rhythm: feed, settle, pose for ten to fifteen minutes, then break. These short bursts of shooting keep the baby drowsy and cooperative without overstimulating her senses.
Keeping a Fussy Baby Calm
When a little one starts to stir, your toolkit matters more than your camera settings. White noise is your best friend—whether from a dedicated machine, a shushing sound, or a hair dryer set on low heat placed a safe distance away (never pointing at the baby). A warm rice sock, heated gently and placed on her back, mimics the comfort of a parent’s touch and encourages deep sleep. Swaddle tightly between poses to recreate the snug security of the womb, and always move slowly, keeping your hands low and close to the posing surface. If she becomes inconsolable, pause entirely: feed, burp, and try again. Never force a pose—a stressed baby will show it in every frame, and the memory you’re capturing should be peaceful, not pressured.
- Keep a hair dryer on low heat nearby for instant white noise (never point it at the baby)
- Offer a pacifier dipped in a drop of formula or milk for extra comfort
- Have a parent stand close to the posing surface for reassurance
- Take a 10-minute break every 45 minutes to reset the baby’s mood
Above all, remember that you are the calm in the room. Babies sense tension, so breathe deeply, speak softly, and let each pose unfold naturally. An unhurried session yields images that are tender, authentic, and worth every patient minute.
Advanced Styling and Troubleshooting for Perfect Shots
Incorporating Family and Sibling Shots
Solo portraits of your newborn are undeniably precious, yet the most heartwarming images often come from including the people who will love her most. A parent’s hands cradling the tiny bundle conveys scale and protection; a mother’s gentle kiss on the forehead captures raw tenderness words cannot express. If you have older children, invite them in for a few orchestrated moments. A big sister’s hand resting on the baby’s back, or a brother leaning in for a nose-to-nose sniff, can yield genuine, candid magic.
Wardrobe and timing are the keys to successful family shots. Instruct everyone to wear solid, neutral tones—cream, soft gray, heather beige, or muted blush—to keep the focus on her delicate features. Skip bold patterns, logos, and bright primary colors that compete for attention. With siblings, patience is your greatest asset. Keep posing sessions short, ideally under ten minutes, and plan a reward. Have a favorite snack, small toy, or sticker chart ready. If the toddler grows restless, let the photographer capture whatever unfolds; a spontaneous hug or curious poke often produces the most authentic frame.
Editing and Final Delivery Considerations
Editing transforms your gallery from good to breathtaking. Aim for a natural, soft finish that smooths the skin and evens redness, but preserve the fine peach fuzz and tiny dry patches—they are part of her charm. Your photographer should also remove any visible support hands, straps, or positioning props from the final images, leaving every shot clean and effortless.
Review your final gallery expecting a thoughtful mix. Look for extreme close-ups of tiny toes, fluttering eyelashes, and rosebud lips, alongside full-body shots of her curled in dreamy poses. A well-rounded collection includes both color and black-and-white, as monochrome adds a timeless, gallery-worthy quality. Print and album investment varies with the photographer’s experience and product size. For a complete, professionally edited digital gallery with print rights, expect €150 to €500; premium packages with fine-art albums or large wall art reach higher. Always confirm what’s included before booking to avoid surprises.
Newborn photography for girls is all about softness, warmth, and safety. Whether you lean toward delicate lace, fresh florals, or minimalist neutral wraps, the goal stays the same: let her natural sweetness take center stage. Timing matters—schedule your session within the first two weeks—and keep the room cozy. Comfort always comes first. With a few gentle, feminine themes in mind, choose the one that speaks to you and start collecting props and outfits. She’ll only be this small for a blink. So hold onto the magic, and capture these fleeting moments with confidence.